Set up disaster recovery of on-premises Hyper-V VMs to Azure
Select a replication goal
- In All Services > Recovery Services vaults, select the vault that was prepared in the previous tutorial, ContosoVMVault.
- In Getting Started, click Site Recovery. Then click Prepare Infrastructure
- In Protection goal > Where are your machines located, select On-premises.
- In Where do you want to replicate your machines, select To Azure.
-
In Are you using System Center VMM to manage your Hyper-V hosts, select No. Then click OK.

Confirm deployment planning
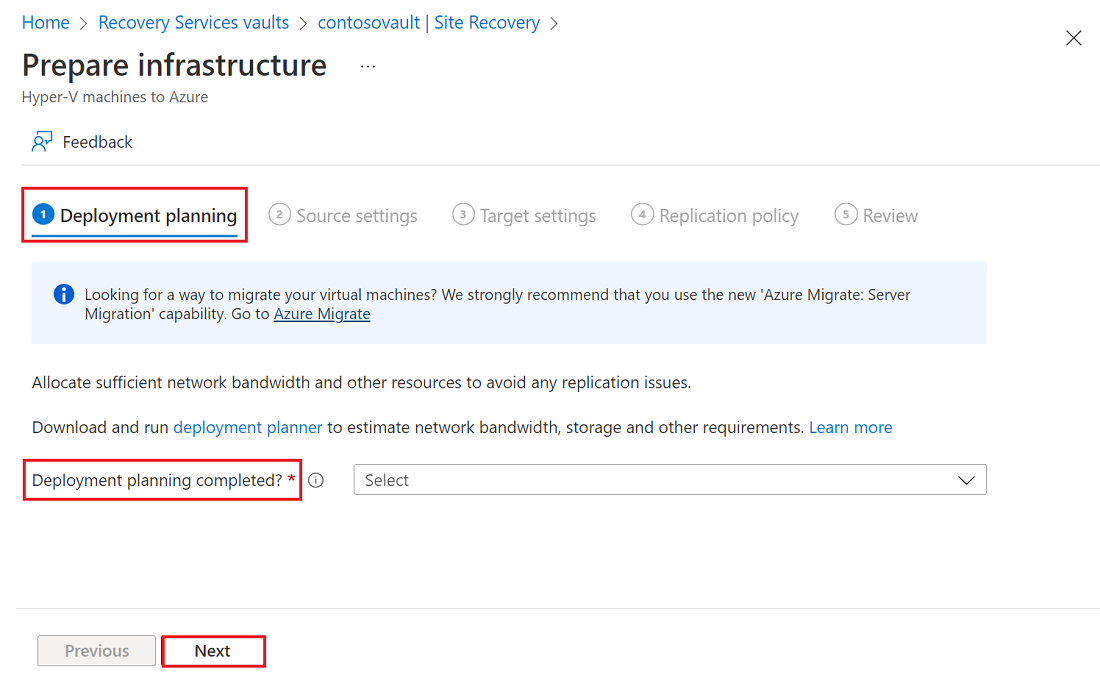
When you're planning a large deployment, you should make sure you complete deployment planning for Hyper-V replication. For the purposes of this tutorial, In Have you completed deployment planning?, select I will do it later in the dropdown list.

Set up the source environment
To set up the source environment, you create a Hyper-V site, and add Hyper-V hosts to the site. Then you download and install the Azure Site Recovery Provider and the Azure Recovery Services agent on each host, and register the Hyper-V site in the vault.
- In Prepare Infrastructure, click Source.
-
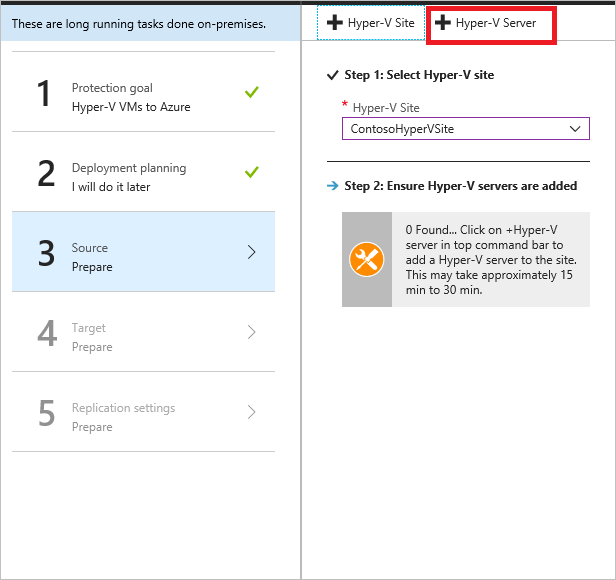
Click +Hyper-V Site, and specify the name of the site created in the previous tutorial, ContosoHyperVSite.

-
After the site is created, click +Hyper-V Server.

-
Download the Provider setup file.
-
Download the vault registration key. You need this key to run Provider setup. The key is valid for five days after you generate it.

Install the Provider
Run the Provider setup file (AzureSiteRecoveryProvider.exe) on each Hyper-V host you added to the ContosoHyperVSite site. Setup installs the Azure Site Recovery Provider and Recovery Services agent, on each Hyper-V host.
- In the Azure Site Recovery Provider Setup wizard > Microsoft Update, opt in to use Microsoft Update to check for Provider updates.
- In Installation, accept the default installation location for the Provider and agent, and click Install.
- After installation, in the Microsoft Azure Site Recovery Registration Wizard > Vault Settings, click Browse, and in Key File, select the vault key file that you downloaded.
- Specify the Azure Site Recovery subscription, the vault name (ContosoVMVault), and the Hyper-V site (ContosoHyperVSite) to which the Hyper-V server belongs.
- In Proxy Settings, select Connect directly to Azure Site Recovery without a proxy.
- In Registration, After the server is registered in the vault, click Finish.
Metadata from the Hyper-V server is retrieved by Azure Site Recovery, and the server is displayed in Site Recovery Infrastructure > Hyper-V Hosts. This process can take up to 30 minutes.
Set up the target environment
Select and verify target resources.
- Click Prepare infrastructure > Target.
- Select the subscription and the resource group ContosoRG, in which the Azure VMs will be created after failover.
- Select the Resource Manager" deployment model.
Site Recovery checks that you have one or more compatible Azure storage accounts and networks.
Set up a replication policy
Note
For Hyper-V to Azure replication policies, the 15-minute copy frequency option is being retired in favor of the 5-minute, and 30-second copy frequency settings. Replication policies using a 15-minute copy frequency will automatically be updated to use the 5-minute copy frequency setting. The 5-minute, and 30-second copy frequency options provides improved replication performance and better recovery point objectives compared to a 15-minute copy frequency, with minimal impact on bandwidth usage and data transfer volume.
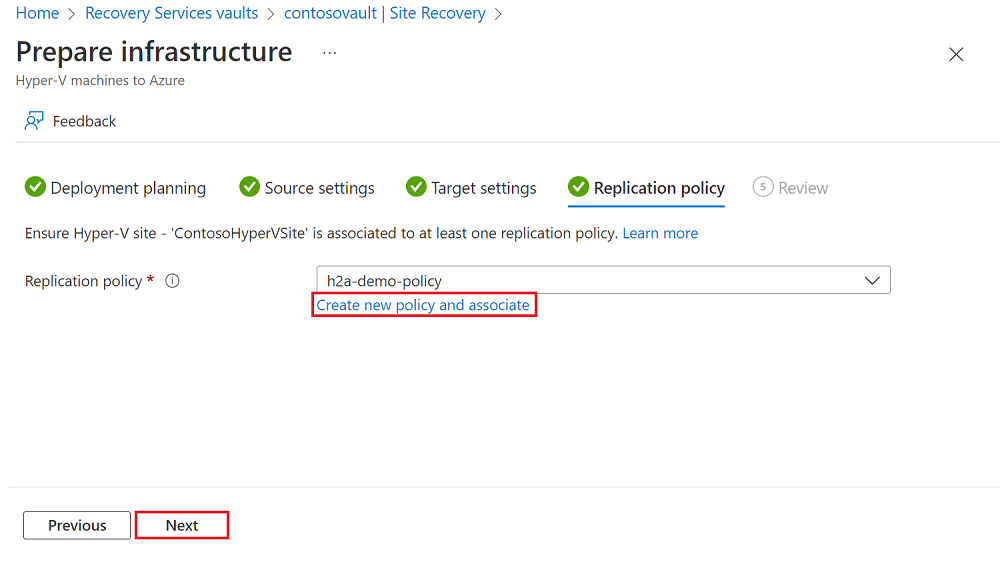
- Click Prepare infrastructure > Replication Settings > +Create and associate.
- In Create and associate policy, specify a policy name, ContosoReplicationPolicy.
- Leave the default settings and click OK.
- Copy frequency indicates that delta data (after initial replication) will replicate every five minutes.
- Recovery point retention indicates that the retention windows for each recovery point will be two hours.
- App-consistent snapshot frequency indicates that recovery points containing app-consistent snapshots will be created every hour.
- Initial replication start time, indicates that initial replication will start immediately.
-
After the policy is created, click OK. When you create a new policy, it's automatically associated with the specified Hyper-V site (ContosoHyperVSite)

Enable replication
- In Replicate application, click Source.
- In Source, select the ContosoHyperVSite site. Then click OK.
- In Target, verify Azure as the target, the vault subscription, and the Resource Manager deployment model.
- Select the contosovmsacct1910171607 storage account created in the previous tutorial for replicated data, and the ContosoASRnet network, in which Azure VMs will be located after failover.
-
In Virtual machines > Select, select the VM you want to replicate. Then click OK.
You can track progress of the Enable Protection action in Jobs > Site Recovery jobs. After the Finalize Protection job completes, the initial replication is complete, and the virtual machine is ready for failover.