Use Azure portal to back up multiple virtual machines
When you back up data in Azure, you store that data in an Azure resource called a Recovery Services vault. The Recovery Services vault resource is available from the Settings menu of most Azure services. The benefit of having the Recovery Services vault integrated into the Settings menu of most Azure services makes it very easy to back up data. However, individually working with each database or virtual machine in your business is tedious. What if you want to back up the data for all virtual machines in one department, or in one location? It is easy to back up multiple virtual machines by creating a backup policy and applying that policy to the desired virtual machines. This tutorial explains how to:
- Create a Recovery Services vault
- Define a backup policy
- Apply the backup policy to protect multiple virtual machines
- Trigger an on-demand backup job for the protected virtual machines
Log in to the Azure portal
Log in to the Azure portal.
Create a Recovery Services vault
The Recovery Services vault contains the backup data, and the backup policy applied to the protected virtual machines. Backing up virtual machines is a local process. You cannot back up a virtual machine from one location to a Recovery Services vault in another location. So, for each Azure location that has virtual machines to be backed up, at least one Recovery Services vault must exist in that location.
-
On the left-hand menu, select All services and in the services list, type Recovery Services. As you type, the list of resources filters. When you see Recovery Services vaults in the list, select it to open the Recovery Services vaults menu.

-
In the Recovery Services vaults menu, click Add to open the Recovery Services vault menu.

-
In the Recovery Services vault menu,
- Type myRecoveryServicesVault in Name,
- The current subscription ID appears in Subscription. If you have additional subscriptions, you could choose another subscription for the new vault.
- For Resource group select Use existing and choose myResourceGroup. If myResourceGroup doesn't exist, select Create new and type myResourceGroup.
- From the Location drop-down menu, choose West Europe.
- Click Create to create your Recovery Services vault.
A Recovery Services vault must be in the same location as the virtual machines being protected. If you have virtual machines in multiple regions,create a Recovery Services vault in each region. This tutorial creates a Recovery Services vault in West Europe because that is where myVM (the virtual machine created with the quickstart) was created.
It can take several minutes for the Recovery Services vault to be created. Monitor the status notifications in the upper right-hand area of the portal. Once your vault is created, it appears in the list of Recovery Services vaults.
When you create a Recovery Services vault, by default the vault has geo-redundant storage. To provide data resiliency, geo-redundant storage replicates the data multiple times across two Azure regions.
Set backup policy to protect VMs
After creating the Recovery Services vault, the next step is to configure the vault for the type of data, and to set the backup policy. Backup policy is the schedule for how often and when recovery points are taken. Policy also includes the retention range for the recovery points. For this tutorial let's assume your business is a sports complex with a hotel, stadium, and restaurants and concessions, and you are protecting the data on the virtual machines. The following steps create a backup policy for the financial data.
-
From the list of Recovery Services vaults, select myRecoveryServicesVault to open its dashboard.

-
On the vault dashboard menu, click Backup to open the Backup menu.
-
On the Backup Goal menu, in the Where is your workload running drop-down menu, choose Azure. From the What do you want to backup drop-down, choose Virtual machine, and click Backup.
These actions prepare the Recovery Services vault for interacting with a virtual machine. Recovery Services vaults have a default policy that creates a restore point each day, and retains the restore points for 30 days.

-
To create a new policy, on the Backup policy menu, from the Choose backup policy drop-down menu, select Create New.

-
In the Backup policy menu, for Policy Name type Finance. Enter the following changes for the Backup policy:
- For Backup frequency set the timezone for Central Time. Since the sports complex is in Texas, the owner wants the timing to be local. Leave the backup frequency set to Daily at 3:30AM.
- For Retention of daily backup point, set the period to 90 days.
- For Retention of weekly backup point, use the Mondayrestore point and retain it for 52 weeks.
- For Retention of monthly backup point, use the restore point from First Sunday of the month, and retain it for 36 months.
- Deselect the Retention of yearly backup point option. The leader of Finance doesn't want to keep data longer than 36 months.
-
Click OK to create the backup policy.

After creating the backup policy, associate the policy with the virtual machines.
-
In the Select virtual machines dialog select myVM and click OK to deploy the backup policy to the virtual machines.
All virtual machines that are in the same location, and are not already associated with a backup policy, appear. myVMH1 and myVMR1 are selected to be associated with the Finance policy.

When the deployment completes, you receive a notification that deployment successfully completed.
Initial backup
You have enabled backup for the Recovery Services vaults, but an initial backup has not been created. It is a disaster recovery best practice to trigger the first backup, so that your data is protected.
To run an on-demand backup job:
-
On the vault dashboard, click 3 under Backup Items, to open the Backup Items menu.
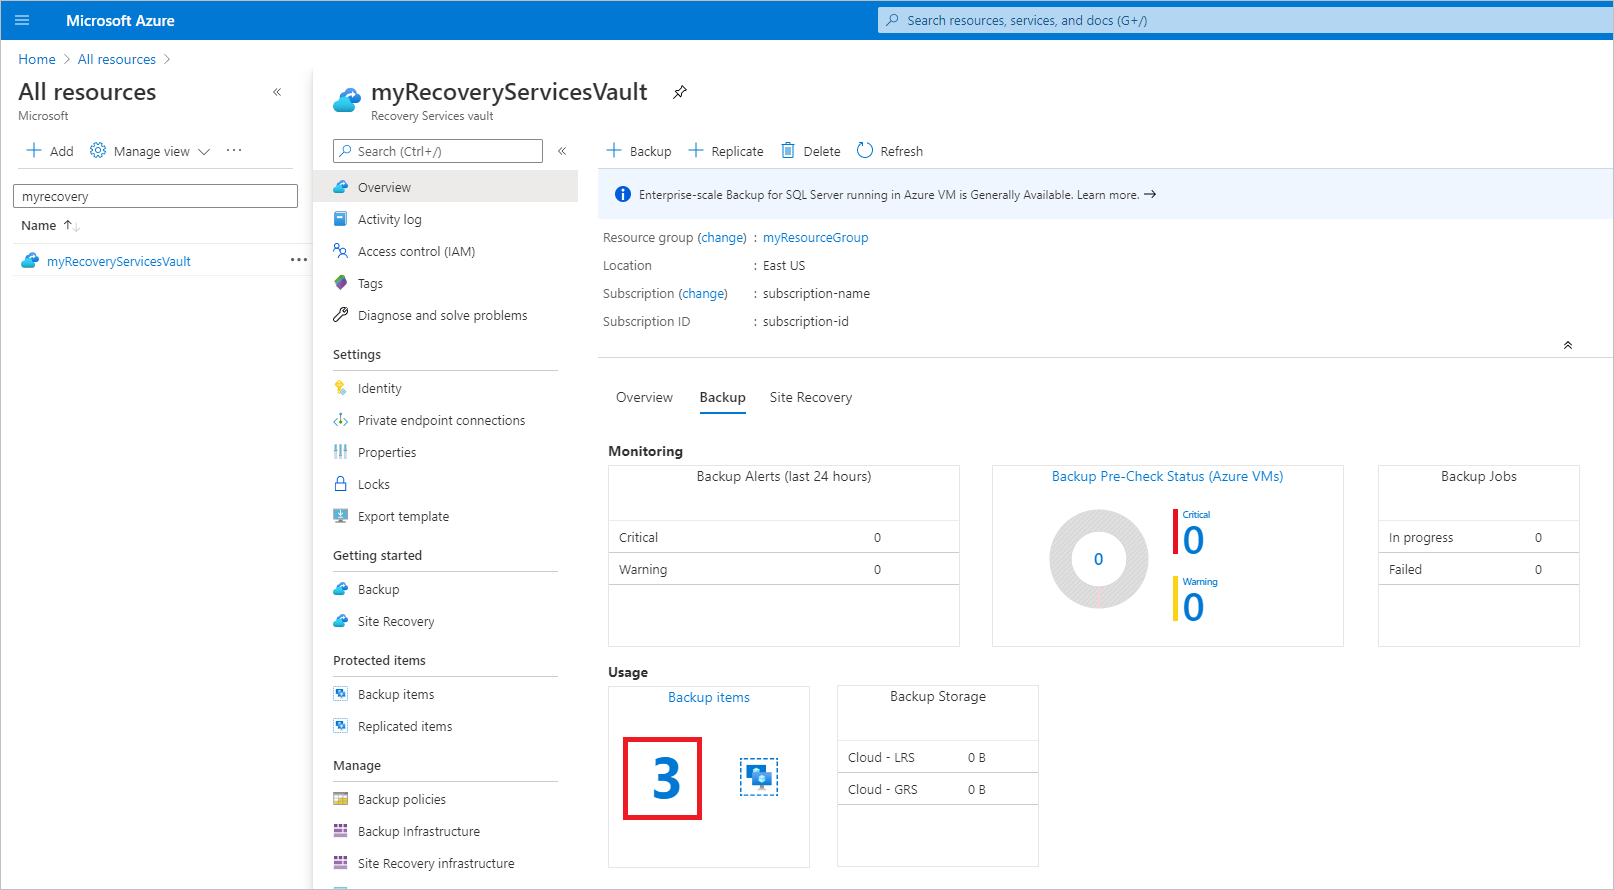
The Backup Items menu opens.
-
On the Backup Items menu, click Azure Virtual Machine to open the list of virtual machines associated with the vault.
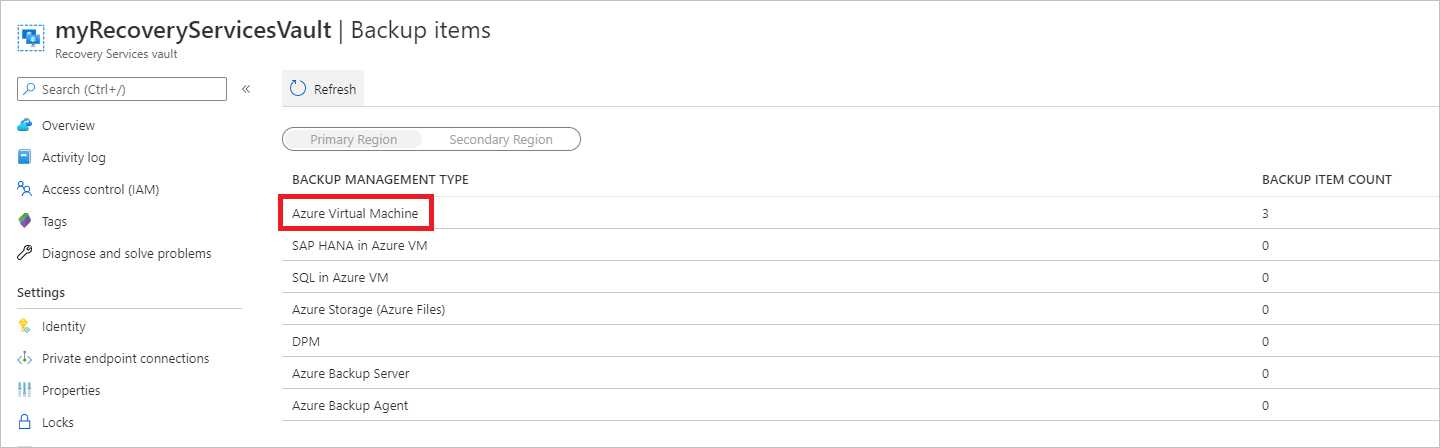
The Backup Items list opens.

-
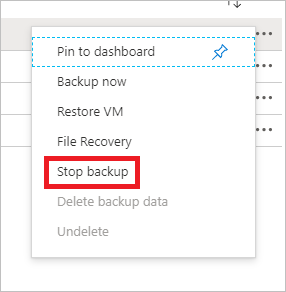
On the Backup Items list, click the ellipses ... to open the Context menu.
-
On the Context menu, select Backup now.

The Backup Now menu opens.
-
On the Backup Now menu, enter the last day to retain the recovery point, and click Backup.

Deployment notifications let you know the backup job has been triggered, and that you can monitor the progress of the job on the Backup jobs page. Depending on the size of your virtual machine, creating the initial backup may take a while.
When the initial backup job completes, you can see its status in the Backup job menu. The on-demand backup job created the initial restore point for myVM. If you want to back up other virtual machines, repeat these steps for each virtual machine.

Clean up resources
If you plan to continue on to work with subsequent tutorials, do not clean up the resources created in this tutorial. If you do not plan to continue, use the following steps to delete all resources created by this tutorial in the Azure portal.
-
On the myRecoveryServicesVault dashboard, click 3 under Backup Items, to open the Backup Items menu.
-
On the Backup Items menu, click Azure Virtual Machine to open the list of virtual machines associated with the vault.
The Backup Items list opens.
-
In the Backup Items menu, click the ellipsis to open the Context menu.

-
On the context menu select Stop backup to open Stop Backup menu.
-
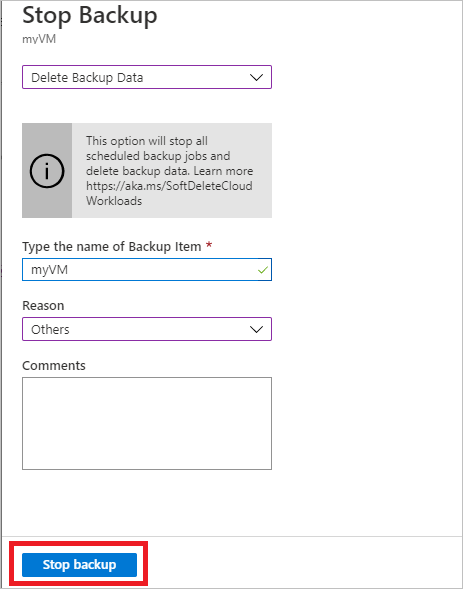
In the Stop Backup menu, select the upper drop-down menu and choose Delete Backup Data.
-
In the Type the name of the Backup item dialog, type myVM.
-
Once the backup item is verified (a checkmark appears), Stop backup button is enabled. Click Stop Backup to stop the policy and delete the restore points.
 .
. -
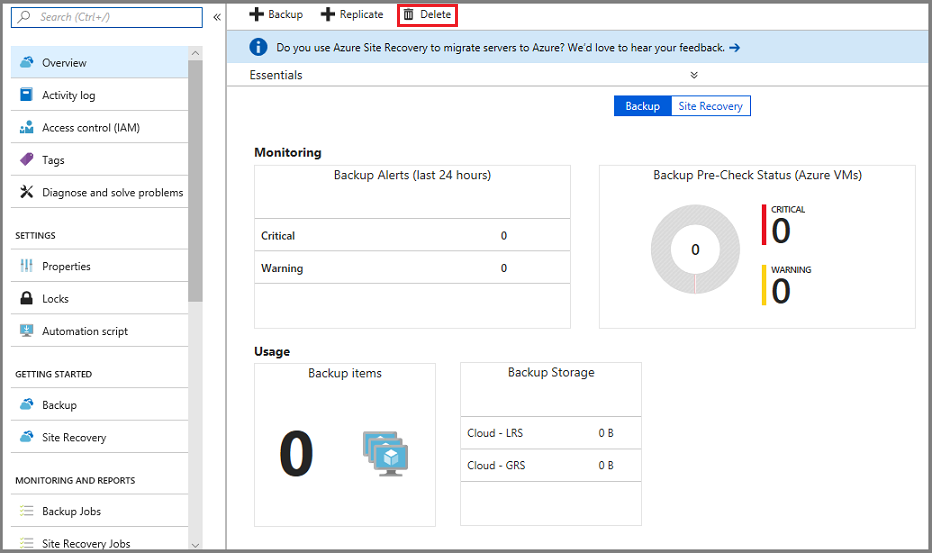
In the myRecoveryServicesVault menu, click Delete.
Once the vault is deleted, you return to the list of Recovery Services vaults.